DTD Tutorial
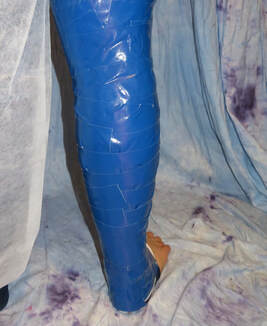
A Duct Tape Dummy or DTD is a simple and inexpensive way to make a duplicate of your body for me to make your costume on.
I require a DTD from all customers getting a fullsuit to ensure it is fitted correctly and comfortable to wear.
I require a DTD from all customers getting a fullsuit to ensure it is fitted correctly and comfortable to wear.
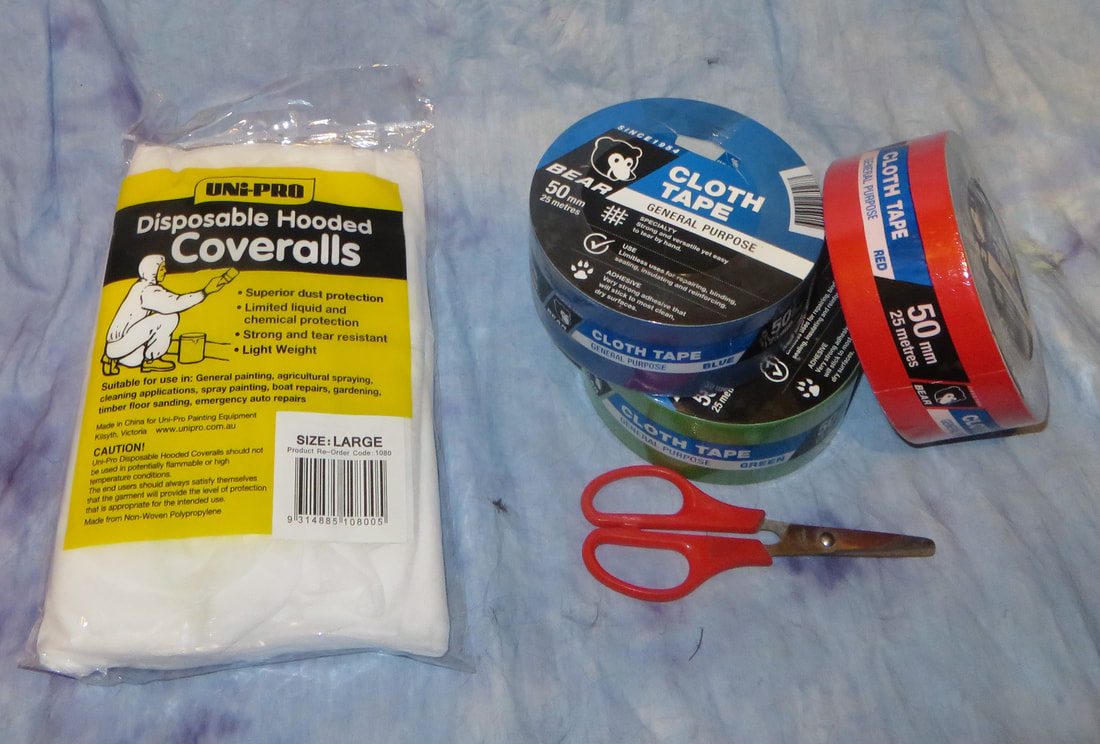
What you need
|
The Process
Set up in a cool room preferably with a fan, you will get hot while making your dummy.
Your posture is very important when making a dummy, stand straight, don't slouch and don't suck anything in. Your suit will be fitted to your dummy so you want it to be comfortable.
Throughout the whole process of making your dummy you should be able to move around a little. If at any time you are in pain or feel your extremities getting cool the tape is too tight and you should remove it immediately and retry another time.
Make sure you have everything you need and go to the bathroom, making a dummy can take 30-60 minutes and you don't want to get caught out.
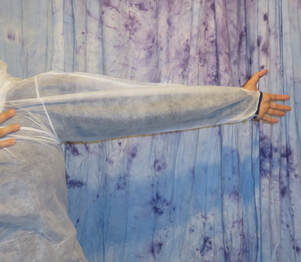
Now put your painters suit on and let the fun begin!
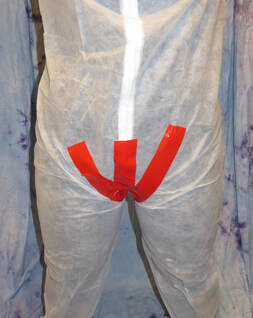
Step 1: Torso
|
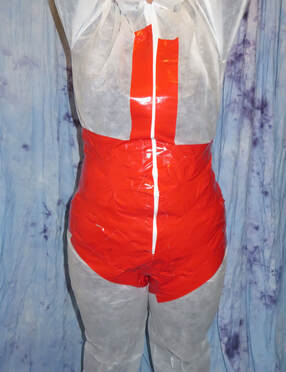
Work your way down the legs a few inches
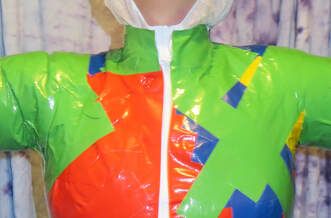
Then start moving up to the chest. Do not tape over the zipper, this allows you to remove the dummy easier and makes it easier for me to work with in the workshop Avoid the temptation to just wrap the tape around in one strip, it will become far to tight and risk not only getting an ill fitting costume but also possibly injuring your friend. |
Step 2: Legs
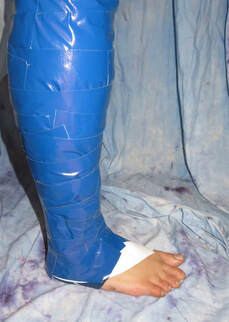
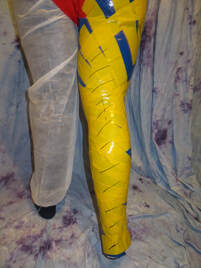
Once you have finished one leg use the marker to draw an 'X' on the wearers knee.
On the back of their leg draw a series of lines across where you will cut to remove the dummy, these help me line everything up at the workshop.
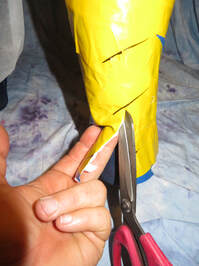
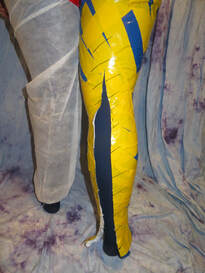
Carefully cut the tape and painters suit up the back of their leg. You will need to cut a slit about 3/4 of the way up their leg in order for them to be able to slide the dummy off.
Sliding your finger between the tape and their skin as you cut will help you prevent any chances of nicking their skin.
Cutting each limb free as you go rather than at the end will help keep you comfortable and cool throughout the process
Now repeat on the other leg.
Step 3: Arms
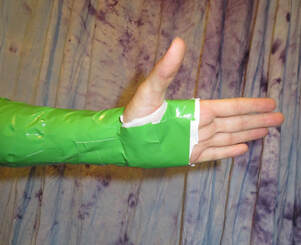
When you finish each arm mark the elbow, draw lines across and cut 3/4 of the way up the limb.
However, unlike the legs on the second arm continue the cut up all the way to the neck so the whole arm and shoulder is free.
However, unlike the legs on the second arm continue the cut up all the way to the neck so the whole arm and shoulder is free.
Step 4: Freedom!
Unzip the painters suit and release the arms that was cut free to the neck.
Slide your other arm free, get your friend to pull on the end of the dummy sleeve gently if necessary.
Now wriggle like you have never wriggled before and slide the dummy down and off like a pair of pants.
This is my preferred method of getting out of your tape cocoon while keeping it as whole as possible but basically get out however you can. If you need to extend or make new cuts than do so, a dummy with a few extra cuts in it is better than you injuring yourself.
Step 5: Finishing touches
Before sending your dummy off you need to do a few more things
- Let it air out. Chances are you will get sweaty in there and you don't want to package it up while its still funky.
- Write your name and/or your characters name clearly across the back of they dummy.
- Fold up your dummy and send it to the address given when you placed your order. A large reinforced envelope or small box available from the post office is fine for this, you don't need to pay to send a huge box.
- If you have any left over tape you don't have a use for feel free to chuck it in with your dummy. I use a lot of tape in the suit making process and I'm always appreciative of some more.
You do not need to tape up the cut seams or stuff the dummy yourself, I do all that once it arrives.
If you have any questions about the DTD making process please feel free to email me and I'll help you out.
If you have any questions about the DTD making process please feel free to email me and I'll help you out.
